
When you start researching solar panels for your home, you quickly run into a wall of technical jargon that sounds like it belongs in an electrician’s handbook, not a homeowner’s guide. Terms like “busbars,” “derating,” and “backfeeding” can make a simple question feel impossible to answer: Is my home’s electrical system ready for solar panels?
The good news is that understanding the electrical requirements for solar isn’t as complicated as it sounds. While the technical terms might seem intimidating at first, the concepts behind them are straightforward. This guide will walk you through everything you need to know about preparing your home’s electrical system for solar panels, from checking your current setup to understanding the solutions available if upgrades are needed.
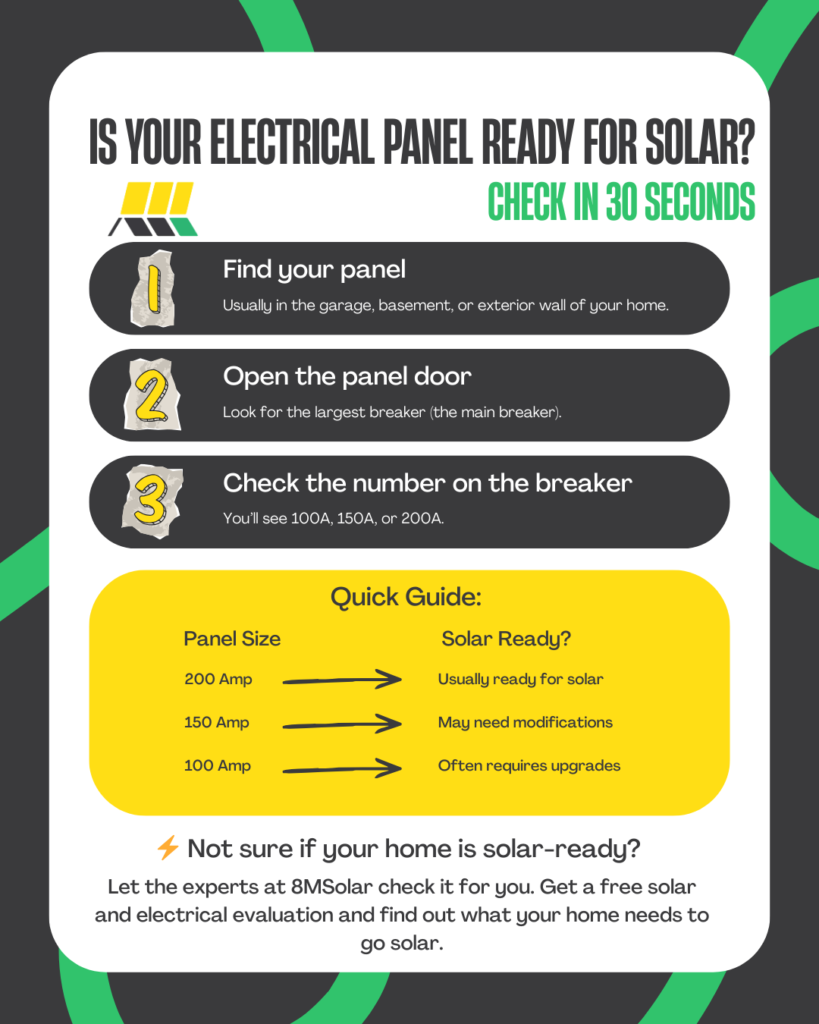
By the end of this article, you’ll know how to check your own electrical panel in 30 seconds, understand the single most important electrical code for solar installations, learn the three solutions available if your panel isn’t ready, and discover other electrical factors that go beyond the main panel.
Assessing Your Current Electrical Panel
Your home’s electrical panel is the heart of your electrical system. It’s where power from the utility company enters your home and gets distributed to all your circuits. When you add solar panels to your home, this panel becomes even more important because it needs to handle both the power coming in from the grid and the power being generated by your solar system.
Do You Need a 200-Amp Service? The Modern Standard
In 2025, a 200-amp electrical service has become the standard for most homes, and there’s a good reason for this. Modern homes are more electrified than ever before. We’re charging electric vehicles in our garages, running heat pumps for heating and cooling, cooking on induction stoves, and powering an ever-growing number of electronic devices. When you add solar panels to this mix, along with a home battery system, your electrical panel needs to be strong enough to handle all these demands.
A 200-amp panel provides the capacity needed for modern living and leaves room for adding solar without immediately maxing out your system. While homes with 100-amp or 150-amp panels can sometimes accommodate solar, they often require modifications or upgrades to do so safely and effectively.
How to Check Your Panel’s Amperage
Checking your panel’s amperage is simpler than you might think. Open your electrical panel door and look for the main breaker. This is usually the largest breaker in the panel, often located at the top. The amperage rating should be stamped directly on the handle or face of this breaker. You’ll see a number like “100,” “150,” or “200” followed by “A” or “AMP.”
If you’ve never opened your electrical panel before, it’s usually located in your garage, basement, or on an exterior wall of your home. It’s a gray metal box, usually about two feet tall and a foot wide. Once you find it, checking the amperage takes less than a minute.
Red Flags: Obsolete and Dangerous Panels
Not all electrical panels are created equal, and some are downright dangerous. If your home has certain types of older panels, you’ll need to replace them before installing solar panels. These panels pose genuine safety risks and are often uninsurable.
Federal Pacific Electric Stab-Lok panels are among the most notorious. Manufactured between the 1950s and 1980s, these panels have a documented history of failing to trip when they should, creating a serious fire hazard. When a breaker should shut off to prevent an overload, these panels sometimes don’t respond, allowing dangerous conditions to develop.
Zinsco panels present similar concerns. These panels have design flaws that can cause breakers to melt onto the busbar, the main conductor that distributes power throughout the panel. When this happens, the breaker can’t trip properly, again creating a fire risk.
Beyond specific panel brands, watch for other warning signs. Rust or corrosion indicates moisture problems. Scorching or discoloration suggests overheating. A tangled mess of wires points to amateur modifications. And if your panel lacks a main breaker altogether, it’s definitely time for an upgrade.
The “120% Rule” (NEC 705.12)
Among all the electrical codes and requirements for solar installations, one stands above the rest in importance. The National Electrical Code’s 120% rule, formally known as NEC 705.12, determines how solar power systems connect to your home’s electrical panel. Understanding this rule is essential for any homeowner considering solar.
What is the 120% Rule in Plain English?
Think of your electrical panel’s busbar as a highway with a weight limit. The busbar is the main conductor inside your panel that distributes electricity to all your circuits. The National Electrical Code says that the total power from your main breaker plus your new solar breaker can’t exceed 120% of the busbar’s rating. This safety margin prevents dangerous overloads that could damage your electrical system or create fire hazards.
The formula looks like this: (Main Breaker + Solar Breaker) ≤ (Busbar Rating × 1.2)
Let’s look at a compliant setup example. Say you have a 200-amp panel with a 200-amp busbar rating. According to the 120% rule, your total load cannot exceed 240 amps (200 × 1.2 = 240). If your main breaker is 200 amps, that leaves 40 amps available for your solar breaker (240 – 200 = 40). A 40-amp solar breaker can support a substantial solar array, typically around 9.6 kilowatts on a 240-volt system. This configuration works well for most residential solar installations.
Now consider a non-compliant scenario. You have a 100-amp panel with a 100-amp busbar rating. The 120% rule allows a maximum total of 120 amps (100 × 1.2 = 120). With a 100-amp main breaker, you have only 20 amps available for solar (120 – 100 = 20). A 20-amp solar breaker would only support about 4.8 kilowatts of solar capacity. For most modern homes, this is insufficient to offset a meaningful portion of electricity usage, especially if you’re trying to power electric vehicles or other high-demand appliances.

3 Solutions for a Non-Compliant Electrical Panel
If your electrical panel doesn’t meet the requirements for solar under the 120% rule, don’t worry. You have three main options to move forward with your solar installation. Each solution has its advantages and works best in different situations.
Option 1: Derating Your Main Breaker
Derating means replacing your main breaker with a lower-amperage breaker. This creates more room under the 120% rule for your solar breaker without changing the panel itself. For example, if you have a 200-amp panel with a 200-amp main breaker but need more space for a larger solar system, you might derate the main breaker to 175 amps. This would give you 65 amps available for solar instead of just 40.
This option works best for homes with a 200-amp panel that are just slightly over the limit and don’t actually need the full 200 amps of power available from their main breaker. Many homes have more electrical capacity than they regularly use, making derating a simple and cost-effective solution. However, before choosing this option, your installer will need to calculate your home’s actual electrical load to make sure you won’t trip breakers during peak usage periods.
Option 2: A Line-Side Tap
A line-side tap, also called a supply-side connection, connects your solar system to the electrical service before it reaches your main breaker. This means the solar connection doesn’t count against the 120% rule at all because it’s not adding load to the busbar.
This option offers many advantages. You can avoid a panel upgrade and don’t need to derate your main breaker. Your home keeps its full electrical capacity while adding solar. However, line-side taps are more complex installations. Not all utility companies allow them, and they require careful coordination to install safely. The work must be performed by a licensed electrician with experience in this type of connection. Despite the added complexity, line-side taps have become increasingly popular because they provide a middle ground between simple derating and a full panel upgrade.
The pros include avoiding a panel upgrade, maintaining full main breaker capacity, and often being more cost-effective than a complete panel replacement. The cons are the increased complexity, the fact that not all utilities permit this connection method, and the absolute requirement for an experienced, licensed electrician.
Option 3: The Full Electrical Panel Upgrade
For homes with older, smaller, or unsafe panels, a complete electrical panel upgrade is the best long-term solution. This involves replacing your existing panel with a new, larger panel that meets current electrical codes and provides ample capacity for your home’s electrical needs and your solar system.
What the Upgrade Process Involves
The upgrade process begins with obtaining the necessary permits from your local building department. Your installer will then coordinate with your utility company to schedule a temporary power shutoff during the installation. The actual installation involves removing the old panel, installing the new one, and reconnecting all your home’s circuits. After installation, a building inspector will verify that the work meets code requirements before the system can be energized.
While this process sounds involved, experienced solar installers handle these upgrades routinely. Most panel upgrades can be completed in a single day, though the entire process from permitting to final inspection may take a few weeks.
Long-Term Benefits of a New Panel
Beyond enabling your solar installation, a new electrical panel offers lasting benefits. It increases your home’s value by improving its electrical infrastructure. Modern panels incorporate the latest safety features, protecting your home and family more effectively than older equipment. And most importantly, a new panel provides future-readiness for additional electrical loads you might add down the road, whether that’s a second electric vehicle charger, a backup battery system, or other high-power devices.
Other Electrical Considerations
While the main electrical panel gets most of the attention in solar installations, several other electrical components and considerations deserve your attention.
Proper Wiring and Conduit Runs
Your solar system needs dedicated wiring to run from the panels on your roof to your electrical equipment. This wiring must be properly sized to handle the current your system will produce, and it needs to be protected by conduit as it runs along your roof and down to your electrical panel or inverter location. The wire gauge and conduit type depend on your system size, the distance the wiring must travel, and local electrical codes.
System Grounding Requirements
Grounding is a critical safety feature in any electrical system, and solar installations are no exception. Proper grounding provides a safe path for electrical current in the event of a fault, protecting people and equipment. It also offers protection against lightning strikes. Your solar system will include multiple grounding points, from the mounting system on your roof to the inverter and the connection to your home’s electrical panel.
Dedicated Circuits for Batteries and EV Chargers
If you’re adding a solar battery system or a Level 2 electric vehicle charger along with your solar panels, these devices will need their own dedicated circuits and breakers. Battery systems often require substantial breaker capacity, sometimes 50 amps or more, depending on the battery’s power output. Similarly, a Level 2 EV charger needs a 40 to 50-amp dedicated circuit. Your installer will need to account for these additional loads when evaluating your electrical panel capacity.
Frequently Asked Questions
How much does an electrical panel upgrade for solar cost in 2025?
A complete electrical panel upgrade costs between $2,000 and $4,000, depending on your location, the complexity of the installation, and the panel capacity you need. While this creates an additional upfront cost, remember that panel upgrades increase your home’s value and safety. Many solar installers can include the panel upgrade in your overall solar financing, allowing you to wrap the cost into your solar investment.
Can I still install solar if my panel is full?
Yes, absolutely. A full panel is a common situation, and solar installers deal with it regularly. Your installer will evaluate whether derating your main breaker, adding a line-side tap, or upgrading your panel makes the most sense for your situation. In most cases, one of these solutions will allow you to move forward with solar even if your panel currently has no available breaker spaces.
Will I be without power during a panel upgrade?
Yes, but usually for less than a day. Panel upgrades require a temporary power shutoff while the old panel is removed and the new one is installed. Your installer will coordinate with your utility company to schedule this outage at a convenient time. Most panel upgrades are completed within 6 to 8 hours, so you’ll be without power for less than a full day.
Does adding a battery have different electrical requirements?
Battery systems do have specific electrical requirements beyond those needed for solar panels alone. Batteries require their own dedicated circuit and breaker, and the connection must be sized to handle the battery’s maximum charge and discharge rates. Most modern home batteries also require a critical loads panel or backup panel to isolate the circuits you want to power during a grid outage. Your solar installer will assess these requirements as part of your system design.
Let the Pros Handle the Wires
After reading through all these electrical requirements, you might feel overwhelmed by the technical details. That’s completely normal, and here’s the reassuring part: you don’t need to become an electrical expert to go solar. A qualified solar installer handles all of these technical assessments and tasks as a standard part of every solar project.
During your initial consultation, your installer will conduct a thorough electrical evaluation of your home. They’ll assess your panel capacity, check for compliance with the 120% rule, evaluate your current electrical load, and determine whether any upgrades or modifications are needed. If upgrades are necessary, they’ll explain your options clearly and help you choose the solution that makes the most sense for your home and budget.
This electrical evaluation is not an optional extra. It’s an important part of making sure your solar installation is safe, code-compliant, and optimized for performance. Your installer will handle all the permitting, coordinate with your utility company, and guarantee that every aspect of your electrical system meets or exceeds code requirements.
Understanding the basics of solar electrical requirements helps you ask informed questions and make confident decisions about your solar project. But when it comes to the actual technical work, you can trust the professionals to handle every detail correctly and safely.
Wondering if your home is ready? Every 8MSolar project starts with a professional evaluation. Get a free electrical assessment with your solar quote today and take the first step toward energy independence with confidence.